Skip the Canned Food Aisle. Here’s How to Start Canning at Home


Having an abundant garden that yields more produce than you can eat is a good problem to have.
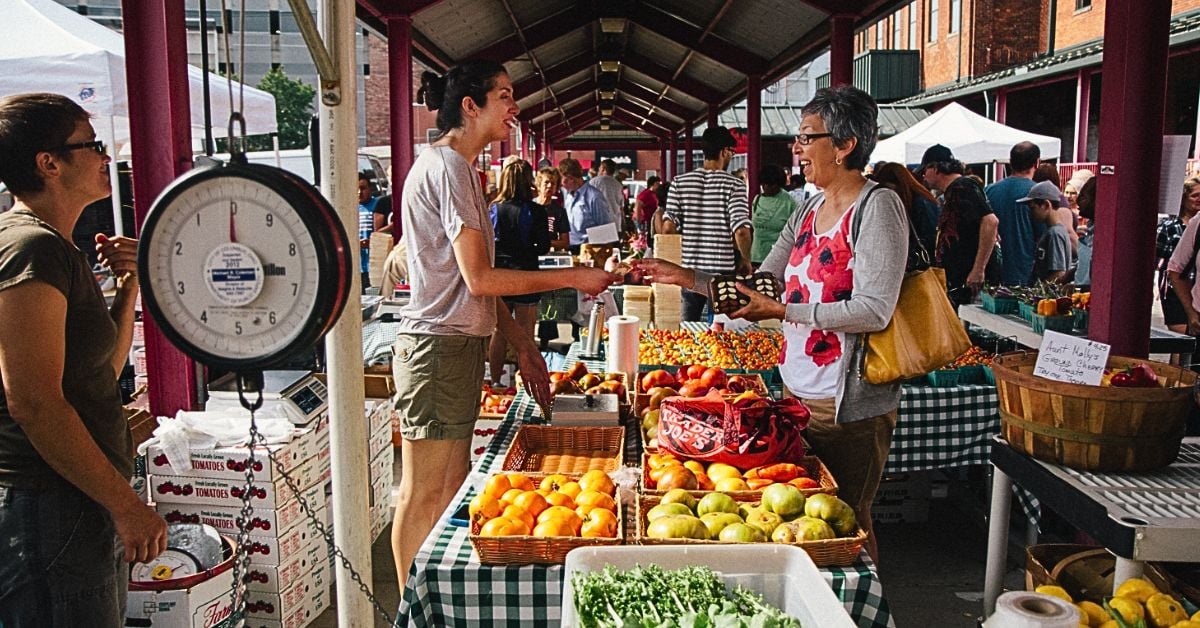
So is finding an awesome CSA program that gives you a hefty share of its harvest, or stocking up on organic goodies at low prices from your local farmers market.
The only issue: how to use up that fresh produce before it goes bad.
If you want to enjoy your fruit and veggies long after they’ve been harvested, canning is one tried-and-true option.
Canning food is a preservation method that allows you to turn fresh produce into shelf-stable food that you can store for a year or more. But it’s not something you just do on a whim.
Canning takes time and an upfront investment, yet it can help you cut down on food waste and save money on groceries.
What You’ll Need to Get Started Canning Food
Don’t feel intimidated by the costs involved with canning. It doesn’t have to be an expensive endeavor.
“If you’re able to grow [produce] yourself … then the only costs you have are the cost of your canning jar, the cost of your canning lid and then the band,” says Melissa K. Norris, a fifth-generation homesteader and author of “The Made From Scratch Life.”
Norris recommends beginners start with water bath canning because it doesn’t require much specialized equipment. If you have a large pot at home, you can use that as long as it’s deep enough for at least an inch of water to cover the tops of your jars.
You’ll also need a canning rack and a lid for the pot, but there are various hacks you can employ.

“[If] you don’t have a lid, you could use a flat cookie sheet or something that would create a lid,” Norris says.
Instead of purchasing a canning rack, people sometimes put extra canning bands at the bottom of their pot or twist up a tea towel to go along the bottom, she says. You just want to make sure your glass jars won’t be sitting directly on the bottom of the pot against the heat source.
Quick canning lesson: The water bath method is what you’d use to process acidic foods — those that fall at a 4.6 pH or lower. That’s going to be most of your fruits — with the exception of a few, like bananas — so this is the way to go if you want to bottle up strawberry jam, blueberry syrup or apple pie filling. You’ll also want to use a water bath method when pickling vegetables.
“A pressure canner is what you would use to can all non-acidic foods,” Norris says.
If you wanted to preserve something like green beans, vegetable soup or even smoked salmon, you’d need to invest in a pressure canner.
Pressure canners can range from about $60 to around $400, depending on the model and size. Those that use a rubber gasket seal will fall on the less expensive end. You’ll need to replace the rubber seal every several years as it gets worn down, but the replacement seals are fairly inexpensive.
The All American brand of pressure canners — which Norris calls “the Cadillac of pressure canners” — is more expensive but has a metal-to-metal seal, meaning you won’t have to buy any rubber gaskets over time.
Once you’ve invested in a pressure canner, however, you’ll have a piece of durable kitchen equipment that’s apt to last a lifetime — with proper care, of course.
You can also view your canning jars and bands practically as a one-time investment, since you’re able to reuse them time and time again. They can last decades, Norris says.
You’ll have to use new lids for each time you process a jar of food. Norris says they average about 25 to 30 cents a piece, but they are sold in packages.
You can save money by buying used canning jars and bands (or getting them passed down from family or friends), but pay close attention to the condition.
“If you’re getting used jars… you want to take your finger and run it around the rim of the jar to make sure there are not any nicks that maybe you don’t physically see but you can feel,” Norris says.
And don’t attempt to can with just any glass jar like the one your jelly or salsa came in from the grocery store.
“You don’t want to use those for canning because the glass for those jars is not designed for multiple uses of canning like your Ball and Kerr canning jars are,” Norris explains. “They’re made of a thicker glass and the glass in those jars are specifically made to be put into pressure canners or hot water bath canners multiple times.”
Does Canning Food Save Money?
Once you can your produce, you’ll have food that can last for at least a year. You can enjoy summer peaches in the dead of winter or make pumpkin loaf in the middle of spring without dealing with marked-up prices for out-of-season produce.
If you’re trying to cut down on your grocery bill, Norris says canning absolutely can help you save money — especially if you’re canning food you’ve grown yourself.
“If I’m growing it myself, I estimate [the cost to be] about 30 to 35 cents a jar and it’s mainly just my lid cost, because I’ve reused [my] jars so many times,” she says.
And depending on the size of your canning jar, that 30-cent homemade jar might hold double the contents of what’s on the grocery shelves for more money.
Even if you’re buying your fruits and vegetables, canning can still save you money if you get your produce at a good price.

Norris says canning is also beneficial to people who have dietary restrictions, health conditions, allergies or special preferences, because you’re completely in control of what goes into your food. And the taste is often superior to what you’d buy from the supermarket.
Preparing and canning your own food may take longer than picking up the store-bought equivalent, but Norris sees it as a satisfying hobby that can feed your family, give you a sense of accomplishment and help you lower your grocery spending. Food processing times vary, but it’s vital to follow the recipe and not make your own adjustments. You don’t want to take a shortcut and risk bacteria build-up, Norris warns.
She recommends following tested recipes from a reputable source. The “Ball Blue Book” is a good resource as well as extension office websites. Norris also shares tested recipes on her website.
“I don’t recommend people just pulling a canning recipe from Pinterest or YouTube, because unfortunately I’ve seen a lot of unsafe canning practices there,” she says.
To preserve the shelf life of your canned produce, make sure to store your jars away from direct sunlight and avoid extreme temperatures.
Nicole Dow is a senior writer at The Penny Hoarder.
- 15 Ways to Fill Your Cart With Fresh Produce for Less
- These Expert Gardeners Share How To Plant a Victory Garden on a Budget
- How to Freeze Everything From Cucumbers to Carrots Without Destroying It
- How to Store 13 Fruits and Veggies So They Stay Fresh (and Save You Money)
- Here’s How Long These Fruits and Veggies Last (and How to Make Them Last Longer)